Welcome all! Today, we will be learning how to use the website Sketchfab to embed 3D models in a WordPress site. This allows your beautiful 3D models, made by hand or through photogrammetry, to be viewable and interactive on a website, which is important in any Digital Humanities project that a) wants to be accessible to those who don’t know how to download/display a 3D model file on their personal computer or b) wants to use 3D models in conjunction with some other interactive data visualization or narrative component. By embedding an interactive model straight into your website, you can interweave said model into a larger story quite easily. This tutorial assumes that you have an object modeled and ready for export, and that you have a working knowledge of the WordPress site editor. With that being said, let’s find out how to embed a model!
Step 1
We are going to start at the export phase! A Sketchfab free account does not allow uploads of 3D model files larger than 100 megabytes. So, you are going to want to decimate your model below 500,000 polygons to get it into this size range. For online viewing, you can go as low as 150,000 polygons. If you are using Autodesk‘s ReCap Photo photogrammetry software, this is accomplished by sliding the decimation slider on the “Export Model” menu:

After correctly setting the slider, you should export the model as either an OBJ or an STL file. Both file formats are supported by Sketchfab.
Step 2
Now, you are going to navigate to Sketchfab and create a free account. After creating your account, navigate back to Sketchfab’s home page and click the orange “Upload” button in the top right corner.
Step 3
You should now see an upload panel that looks like this:

Find your 3D model file in your computer’s files and drop it into this panel. Press the blue “Upload” button.
Step 4
Pressing the “Upload” button will bring you to an “Edit Model” page where you can control your model’s name, description, and tags on Sketchfab:

My pictured page isn’t very descriptive, but you are welcome to be as wordy as you desire! The more you write, the more people may find your model and the more information any viewer will have. So, describe away! The only requirement is that you keep the “Who can see?” menu set to “Public” so that anyone can see your model. If you don’t, the website embedding will not work.
When you are satisfied with the information that you entered, press the orange “publish” button in the bottom right corner.
Step 5
After publishing your model, click on the “View My Model” button in the top-right corner of the editing page. This will bring you to your model’s public viewing page:

Scroll down below the model viewer and your username to where there is a button that says “Embed.” Click this button. A window called “Embed Viewer will come up:
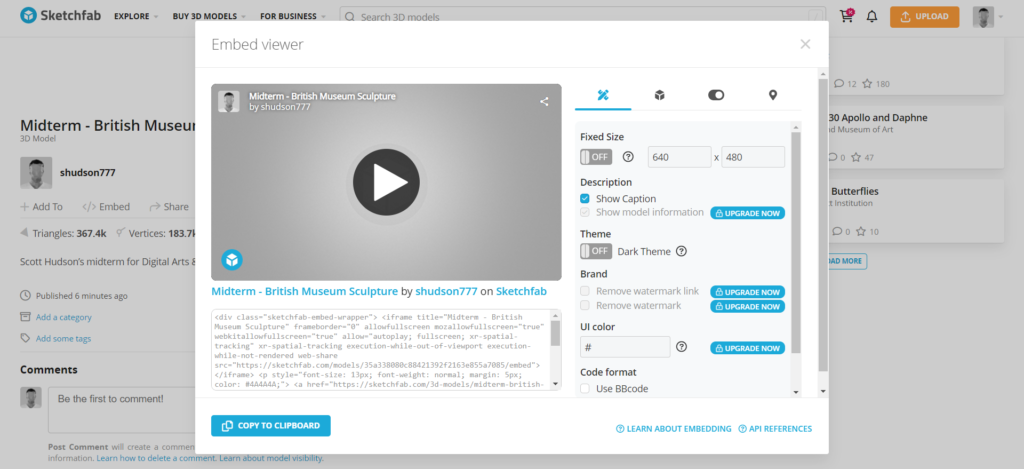
In the bottom-left corner of this viewer, click on the “Copy to Clipboard” button.
Step 6
With the embedding code in your clipboard, navigate to the WordPress page in which you want to embed your model. Go to the page’s editing function, and create a new “custom HTML” block, found under “Widgets.” In this block, paste the html code that you copied from Sketchpad:

With this HTML entered, you can now publish your site, and you should be able to see a newly embedded 3D model which you can interact with in your browser. Here’s mine:
Pretty cool, right?
If you want some more detailed instructions on the embedding of HTML code in WordPress, see this tutorial from NYU. It focuses on embedding timelines from TimelineJS, but the instructions apply to most iFrame web apps.
More detailed instructions for uploading and editing models in Sketchfab can be found on the website’s help center.
I really enjoyed your tutorial and felt as though it was really easy to follow. This tool seems like a great way to implement one’s 3D models. While I think it is okay I did not know how to do it until now I think this is a helpful skill to be used going forward. As the one responsible for embedding our 3D model into our webpage my group’s final project maybe this is a possible route for me.