Metashape is a photogrammetry software that can create 3d models and meshes from unorganized photos or laser scans, similarly to Recap Photo. There are a few differences between Recap Photo and Metashape that should be noted:
- Metashape allows unlimited photos, unlike Recap’s 300 photo limit
- Metashape is free to use
The biggest difference our group found between the two software is that Metashape is capable of modeling rooms, whereas Recap Photo specializes in objects that require a circular trajectory in the photos. This tutorial will walk you through the steps to turn your images into a digital 3D textured model.
Download Software
You can download Metashape from the link below:
https://www.agisoft.com/downloads/installer/
Make sure to note the system requirements, as this software utilizes a lot of CPU and GPU resources.
Upload your pictures
You need to upload the images of your desired object. If you would like to follow along with the images in this tutorial, the images for the water pitcher can be found here:
https://drive.google.com/drive/folders/1xtigeiYpUAk8EghhLTMfhx22rrNg0zKf?usp=share_link

Metashape will display some warnings at you if any of your photos:
- Are oriented differently than the others
- Are zoomed in or out
Within the image selector in Metashape, you can right click an image and deselect it if you do not want it included in the model.
Align Photos
To incorporate your 2d images into a 3D environment, you now need to go through the process of aligning similar photos together and create tie points for your mesh model.
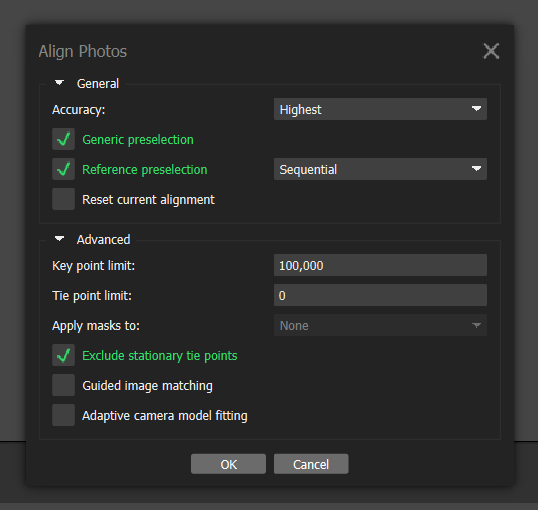
In order to align your photos, go to Workflow -> Align Photos. For generally good results, deselct generic preselection and reference presentation, set the accuracy to the highest setting, set the key point limit to 100,000, and set the tie point limit to 0. Tie points are the similar colored pixels between any two or more photos that the program marks as a point in 3D space. It is initially set to 4,000, but if you set it to 0, MetaShape will instead try to find as many tie points as it can within each photo.
Leave all the other settings in their defaults, and click Ok. After several minutes, the results should look similar to this:

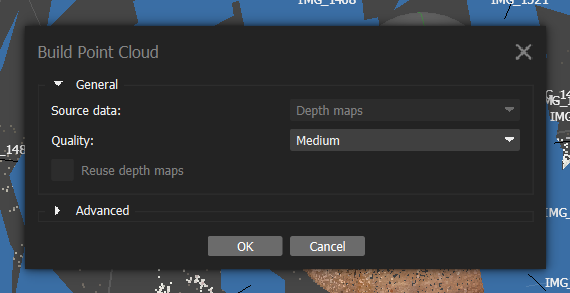
Create a Point Cloud
Next, we need to make a point cloud of the object. Go to Workflow -> Point Cloud, and leave all of the default settings and click ‘ok’. The resulting point cloud should look similar to what was generated in the previous step.
Create the Mesh
Now you must create the mesh model. This process connects the points in the point cloud with the triangles/quadrilaterals that define solid shape in 3D models.
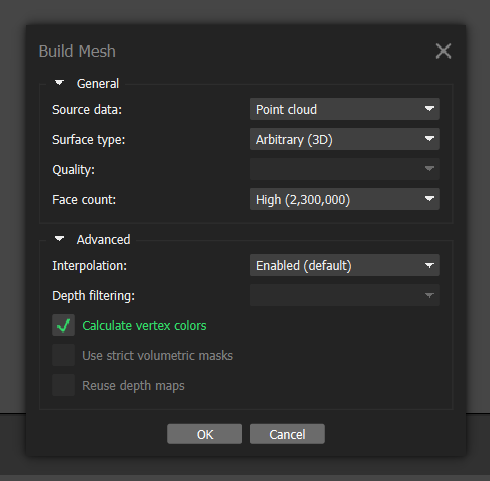
To do this, go to Workflow -> Build Mesh. Select ‘Point Cloud’ as your source data, leave all other default settings, and click ‘ok’. After the process is complete, you should have a solid model that should look like this:

Create Texture
We must add texture to the model. Go to Workflow -> Build Texture, and leave all the settings as their defaults. MetaShape will use the generic texture found in all the images for the model.
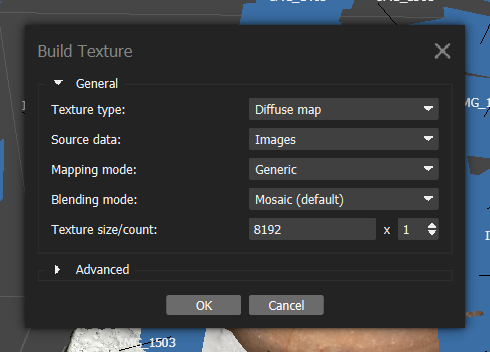
After the process is complete, your model should now contain high quality surface texture.

Export
Finally, we can export our finished model. Go to File -> Export, and you can save your model as a .obj file.
I like how in depth this tutorial is. This process seems daunting at first but you explain it really well and by the end of the tutorial I feel like I can model a 3D object in metashape myself. Your images were very helpful in the way that they guided me through your tutorial smoothly. Good work!