Hi, everyone! In this tutorial, I’m going to show you all how to make vivid, informative, and inspired presentations on Prezi. You may have heard of (or even used) the platform before, but if you’re new to it, Prezi is an online tool for making interactive presentations that move around a single, larger image. In digital humanities, much like any other field involving sharing knowledge with others, presentation is important; what’s the point in trying to show off you’re hard work if other people can’t understand it? In my opinion, Prezi presentations are very visually distinct and enjoyable to view. They allow you to present text, data, and images in a visual and easy-to-follow way. They’re kind of like Powerpoint presentations with a bit of extra flair.
Now, onto the tutorial!
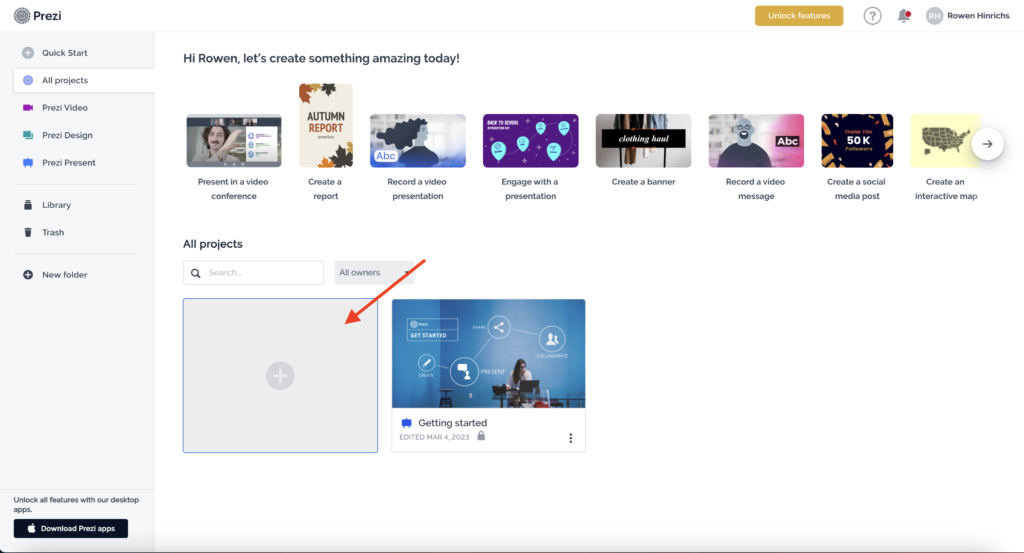
Step 1: Open Prezi.com and either log in with your email and password or create a new account. Then, click on the grey box with a plus sign underneath “All Projects” and the small search bar. You’ll be asked which kind of project you’d like to make. For this tutorial, we’ll be going with “Presentation.”
After that, you’ll be prompted to choose a theme. Pick whichever you like, but for this tutorial, I’ll use Blank – Dark. Give the presentation a title in the box on the bottom left, click create, and you’re off to the races.
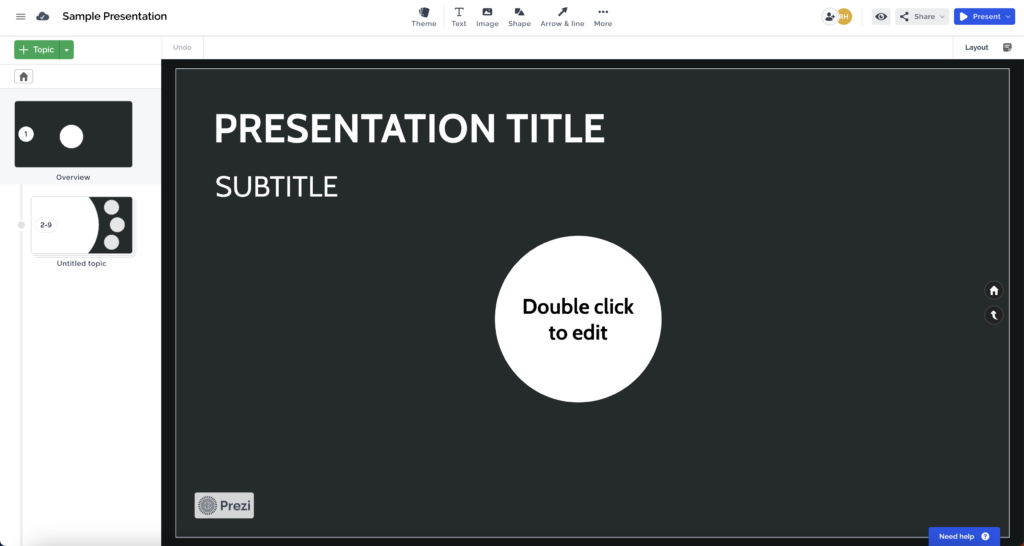
You’re now in the presentation editor. It might look a little more complicated than Google Slides, but it’s not that bad. At the top, you can add specific elements to the part of the presentation you’re on (text, pictures, and so on). You can move and edit objects in much the same way you would in Google Slides. Clicking on a text box will allow you to resize it, change the text within it or change the properties of the text.
Step 2: Click on the top two text boxes and enter a new title and subtitle for your presentation.
On the left side of the screen, you’ll see a topic viewer. This is how you make sections in your presentation and control how Prezi zooms into and between them.
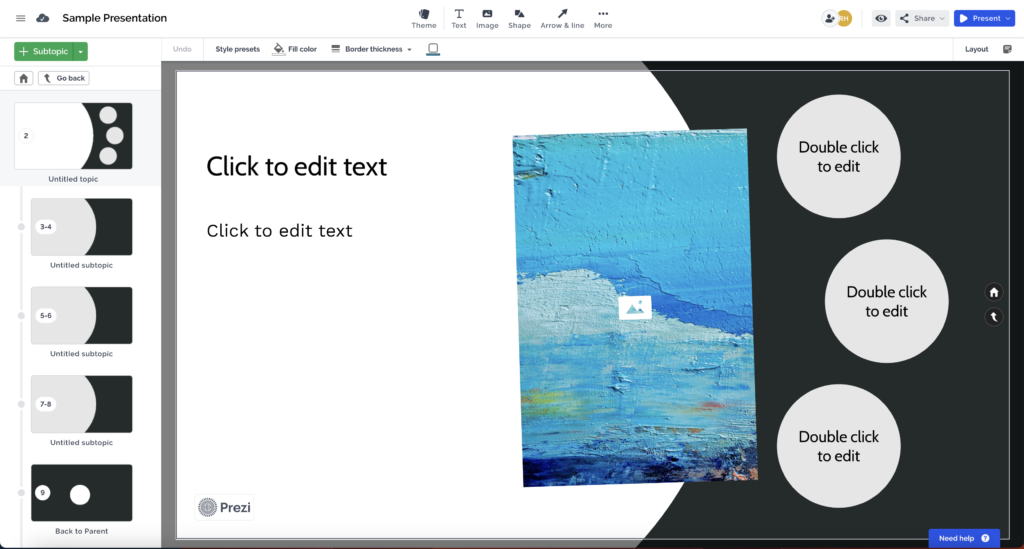
Step 3: Click on the section labeled “Untitled Topic” on the left sidebar to zoom into it and see its subtopics.
When your online audience arrows through your presentation, or when you present it yourself, Prezi will move and zoom in to different sections of your presentation, the order of which is shown on the left side. The presentation moves top-down according to the order on the left, much like Slides or Powerpoint. Using the right and left arrow keys will move you forward and back in your presentation. Clicking on a specific block will take you to that stop, and if you ever get lost, click the home icon beneath the green Subtopic button to go back to your main page.
Step 4: Go to Untitled Topic and delete the sample image by clicking it and pressing the delete key.
Step 5: Click the green “+Subtopic” button just above the topic viewer. This will create a new node that Prezi will zoom to. When you do this, you can also see the order that prezi will zoom to them by looking at the yellow lines connecting each node and the numbers in the top left corner of each node.

Step 6: Click on the text boxes to edit them, and put in whatever you want! You can also drag around the boxes on the topic viewer to change the order that they’re presented in
Step 7: Click on the buttons on the top of the page to add images, text, shapes, and more. This section works just like Slides or Powerpoint: drag images around to move them, resize them by dragging the corners, and so on.
Step 8: Rename the presentation by clicking on the title in the top left corner of the page, and you’re done! Prezi is a powerful tool, so feel free to experiment by adding more topics to the home page, playing around with different themes, and whatever else you want to do.
Finally, here are a couple additional resources that can help you out if you get stuck.
Another tutorial I found online
Happy presenting!
I used Prezi countless times in high school to present anything from book reports to sports cars. It offers a smoother, more visually appealing presentation than a normal slideshow would. After following your tutorial, it was very easy to set up a presentation I’m making in another class!
I hadn’t previously considered Prezi to be related to digital arts and humanities, but you’re totally right that presentation is a very significant factor to the field. This tutorial was laid out very well, you did a good job at mimicking the writing style of online tutorials. I feel like I could jump right in to Prezi now!
Wow, Prezi… nothing like feeling seasick from a slideshow. What an excellent tool to do a tutorial on; great work. Even just hearing the name makes memories of middle school come flooding back into my mind. Every now and then, some parts of me long to go back–it truly was a simpler time. I never really see people make presentations using Prezi in my classes nowadays, maybe it’s time for it to make a comeback in DGAH110?
I always make slide shows in Google slides and I have never heard about this platform before but I will definitely use it in the future as I struggled a lot with making presentations. Your tutorial is very detailed and well-organized. I think I will follow your tutorial to make my presentation for another class.
I’ve never used Prezi before – but it seems like a great alternative to PowerPoint and Google Slides. I’ve only taken a few classes at Carleton that have required presentations, but it’s nice to have a new tool to use in case I need to make any in the near future. I’m curious as to whether Prezi offers the same “Publish to the Web” feature that Slides does (my group used Slides for our final presentation today, so I know how to upload it on that site). If it does have that ability, it would’ve been cool for someone to make an interactive presentation for their final one today (though I imagine 20 seconds wouldn’t be quite enough time to explore all of the presentations capabilities).