For this assignment, we are tasked to make a blog post tutorial. This tutorial will detail how to change the document segments in Voyant Tools. This was really helpful for me during the midterm and hopefully will also be useful for you, as well!
Step 1: Inspect your HTML file
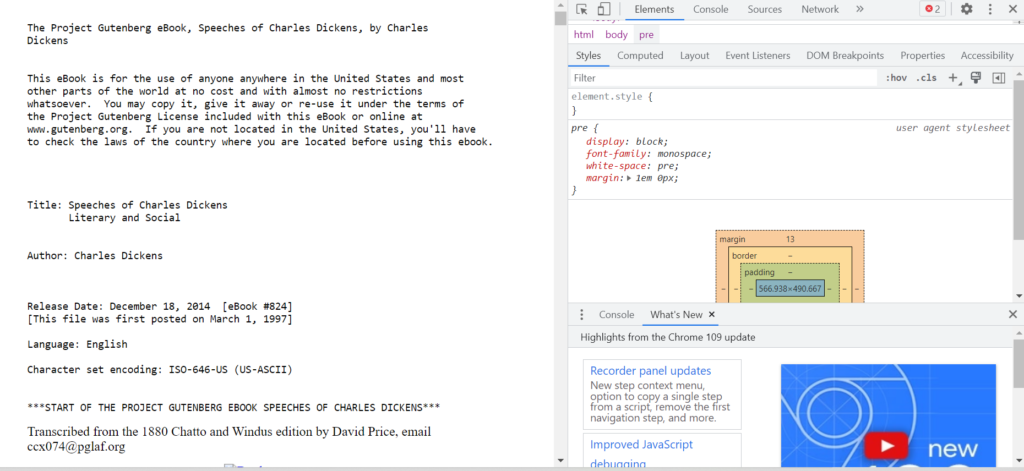
Step 2: Click this icon
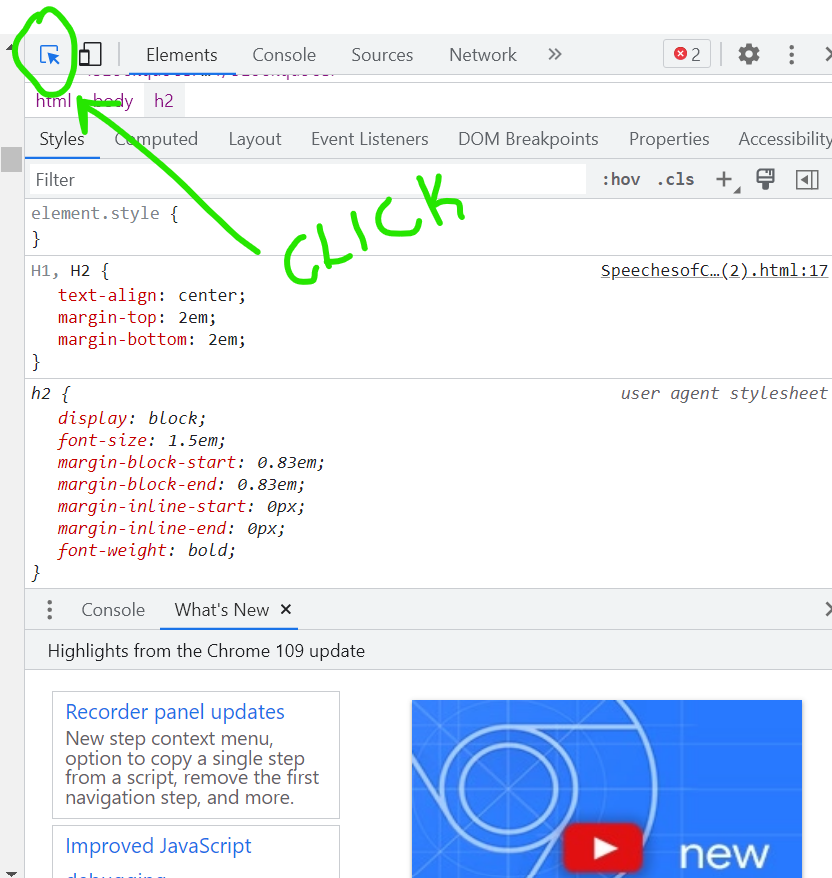
Step 3: Find the segments in the code

Step 4: Change your options in Voyant Tools
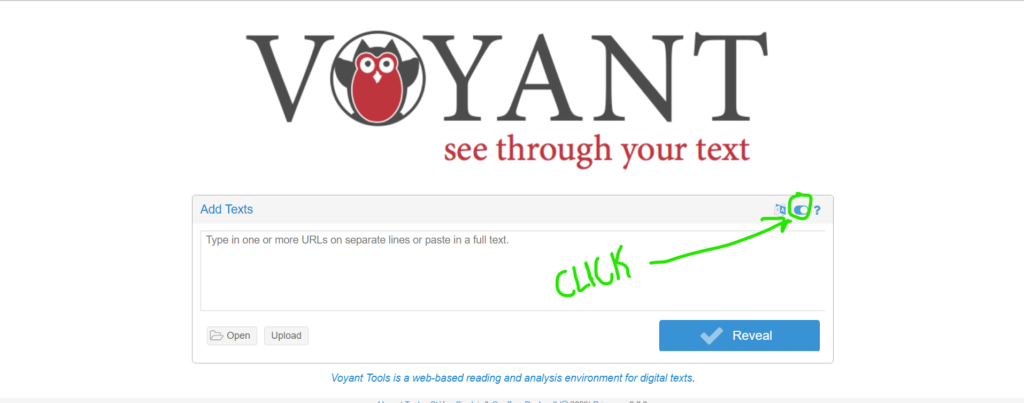
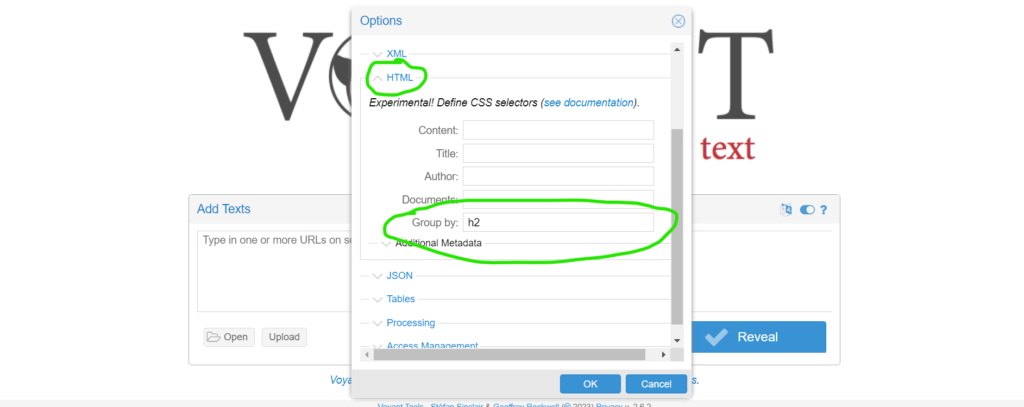
Basically, what you end up doing here is putting what your file is segmented by in code, into Voyant Tools so they will segment the file how you want it. For instance, I wanted my file to be segmented each time there was an “h2”, so I typed “h2” in the “group by” section in Voyant tools.
Step 5: Upload your file
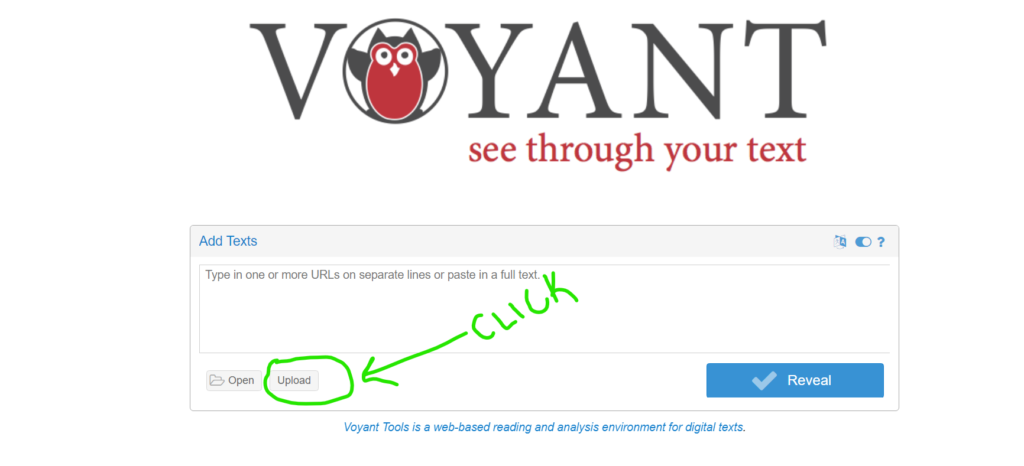
Step 6: Check out your results/trial and error
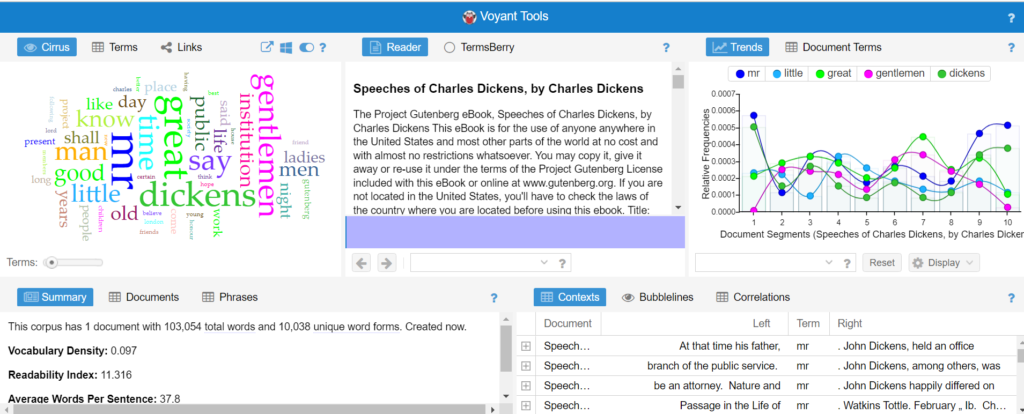
This process worked very well for this document, but no two files are the same. If it doesn’t work the way you want it to, go back to the document and continue looking at the code until you can find a solution!
This is something I never even thought about doing. Regardless, I found it helpful as this is something I possibly could have used for past assignments. I also appreciate you using a green arrow on what to click on. If I was to make my tutorial again I may have included a similar thing.